
How dry herb vaporizers work
Dry herb vaporizers heat ground plant material without combustion, releasing active compounds as vapor rather than smoke. The quality of that vapor depends entirely on the heating mechanism inside the chamber. Most devices rely on one of two methods: conduction or convection.
Conduction heating works through direct contact. The heating element touches the herb directly, transferring heat rapidly. This method is common in budget-friendly models and older devices. Because the heat transfer is immediate, conduction vaporizers often heat up faster. However, this direct contact can lead to uneven heating. The herbs touching the metal plate may burn or become too hot, while the herbs in the center remain under-vaped. This inconsistency can result in harsher vapor and wasted plant material.
Convection heating uses hot air to warm the herb. A fan pushes heated air through the packed chamber, ensuring the entire bowl reaches the target temperature evenly. This method is generally preferred by experienced users because it produces smoother, more flavorful vapor. Since no part of the herb touches the heating element directly, the risk of combustion or scorching is significantly lower. Convection devices also tend to be more efficient, extracting more active compounds from the same amount of flower.
Some modern devices combine both methods to balance speed and quality. These hybrid systems use a conduction base for rapid initial heating, followed by convection airflow to maintain even temperature throughout the session. Understanding this distinction helps explain why vapor quality varies so much between different models, even when they share similar temperature settings.
Best portable dry herb vaporizers
Portable vaporizers prioritize discretion and battery efficiency without sacrificing the heating consistency found in desktop units. The market has shifted from hybrid convection-conduction models to pure convection or hybrid designs that offer faster heat-up times and more even extraction. When selecting a portable device, focus on the heating chamber material, battery capacity, and the precision of the temperature controls.
The Storz & Bickel Mighty+ remains a benchmark for build quality and vapor consistency. Its hybrid heating system ensures that every draw delivers a smooth, flavorful experience, while the modular design allows for easy cleaning and maintenance. The battery life is robust enough for all-day use, making it a reliable choice for users who prioritize performance over compactness. The device features precise temperature control, allowing users to dial in specific cannabinoid profiles.
For users seeking a balance between portability and power, the Pax 3 offers a sleek, minimalist design with smart temperature control and app connectivity. The heating chamber is small, which conserves herb, but the convection heating ensures that the material is heated evenly from all sides. The battery life is respectable, though heavy use may require a mid-session charge. The app provides detailed usage statistics, helping users understand their consumption patterns.
The Arizer Solo 2 stands out for its glass path and detachable battery, offering a clean, pure flavor profile that many users prefer. The glass path is easy to clean and does not retain flavors from previous sessions. The detachable battery allows for extended use without interrupting the session, as users can swap in a charged battery. The heating element is located at the base of the glass path, providing consistent heat distribution.
Comparison of top portable models
The following table compares the key specifications of the top three portable models. This data helps users weigh factors like heat-up time, battery life, and heating type when making a purchase decision.
| Model | Heating Type | Battery Life | Heat-Up Time | Price Range |
|---|---|---|---|---|
| Storz & Bickel Mighty+ | Hybrid | Up to 90 min | ~15 sec | $300-$400 |
| Pax 3 | Convection | Up to 45 min | ~15 sec | $200-$300 |
| Arizer Solo 2 | Convection | Detachable (Up to 90 min) | ~60 sec | $200-$300 |
Best desktop dry herb vaporizers
Desktop vaporizers prioritize volume, consistency, and multi-user capability over portability. These units function as dedicated stations, typically connecting to a power source via a cord or battery base, allowing for larger heating chambers and more robust temperature control than handheld models. This architecture supports longer sessions and higher throughput, making them ideal for home use or small gatherings.
The core advantage of a desktop unit lies in its heating mechanism. Most employ convection or convection-conduction hybrid systems, where hot air is forced through the herb chamber. This ensures even extraction and minimizes the risk of combustion. The resulting vapor is often smoother and more flavorful, as the larger internal volume allows for better heat stabilization and filtration before inhalation.
Puffco Peak Pro Desktop Adapter
The Puffco Peak Pro Desktop Adapter transforms the popular portable Peak Pro into a stationary setup. It connects to the unit via a dedicated hose, allowing users to enjoy the Peak’s precise digital temperature control and low-temperature vapor production in a seated environment. This setup eliminates the need to hold the device, offering a more relaxed experience while maintaining the brand’s signature flavor clarity.
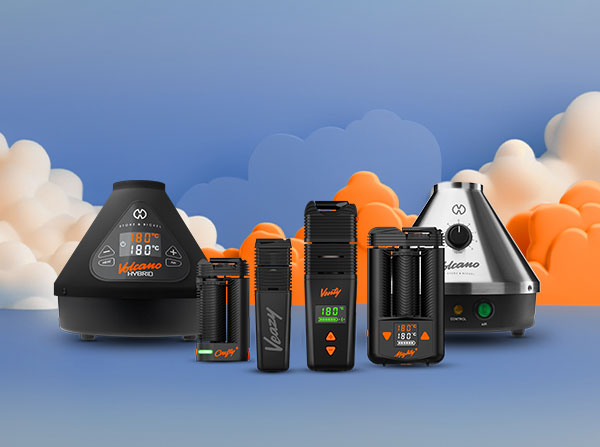
Volcano Hybrid
The Volcano Hybrid by Storz & Bickel remains a benchmark in the desktop category. It features a dual heating system combining convection and conduction, ensuring thorough extraction of dry herbs. The unit includes a balloon inflation valve and direct inhalation hose, providing flexibility for different user preferences. Its durable construction and consistent performance have made it a staple in the industry for years.
Arizer Extreme Q
The Arizer Extreme Q offers a unique approach with its external heating chamber. The herb is placed in a glass bowl that sits on a separate heating base, connected by a long tube. This design keeps the heat source away from the user and allows for easy cleaning. The Extreme Q is known for its large vapor production and ability to handle multiple users, making it a popular choice for those who prioritize volume and ease of maintenance.
Optimal temperature settings for flavor
Dry herb vaporizers work by heating plant material to specific thresholds, causing cannabinoids and terpenes to vaporize without combustion. The temperature you select determines which compounds are released, directly influencing both the flavor profile and the intensity of the experience. Finding the right setting is less about guessing and more about understanding the activation points of your herb.
For users prioritizing taste, the sweet spot lies in the lower range. A temperature of 320–340°F (160–171°C) is widely cited for preserving delicate terpenes and maximizing flavor. At this level, you get a smooth, aromatic vapor that highlights the distinct notes of the strain, from citrusy limonene to earthy myrcene, without the harshness that comes with higher heat.
If the goal shifts from subtle flavor to stronger effects, you need to go higher. Temperatures between 390–430°F (199–221°C) are best for unlocking more cannabinoids, including those that contribute to a more potent psychoactive effect. As you push toward the upper limits of your device’s range, the vapor becomes denser and the flavor profile shifts toward more robust, sometimes peppery notes, as heavier compounds begin to volatilize.
When to reload your vaporizer chamber
Knowing when to reload your chamber prevents wasted material and ensures consistent vapor quality. Instead of guessing, observe the herb’s physical state and taste profile to determine if the chamber is spent. The goal is to extract maximum flavor and potency without burning the remaining plant matter.
Visual and texture cues
Fresh herb is bright green with visible trichomes. As you vape, the material undergoes a predictable transformation. It turns a darker, olive-green or brownish color and becomes brittle and dry to the touch. If the herb looks like dried-out leaves rather than fresh plant material, the active compounds have largely been depleted. At this stage, reloading is necessary to restore flavor and effect.
Flavor and vapor density
Taste is the most immediate indicator of spent herb. Freshly loaded chambers produce dense, flavorful vapor. As the herb is used, the vapor becomes thinner, hotter, and less aromatic. If you notice a sharp drop in vapor production or a harsh, ashy taste, the chamber is likely empty of usable compounds. Continuing to vape at this point yields little benefit and may irritate the throat.
Temperature considerations
Your temperature setting influences how quickly the herb is spent. Higher temperatures (above 390°F / 200°C) extract compounds rapidly but can burn the herb faster, leading to a shorter session. Lower temperatures (320–340°F / 160–171°C) preserve flavor and extend the life of the herb, allowing for more draws per load. Adjust your settings based on whether you prioritize longevity or intensity.
Essential maintenance and cleaning
Regular cleaning is the single most important factor in preserving vapor quality and extending the lifespan of your device. Resin and plant matter accumulate in the heating chamber and mouthpiece, restricting airflow and imparting a harsh, burnt taste to subsequent sessions. A consistent maintenance routine prevents clogging and ensures that the device operates at peak efficiency.
Step 1: Cool and disassemble
Always allow the device to cool completely before handling internal components. Heating elements retain thermal energy long after the unit is turned off, posing a burn risk and potentially damaging sensitive parts if forced apart. Once cool, unscrew the mouthpiece and remove the oven lid or chamber cap. This exposes the heating path and allows you to inspect the screen for blockages.
Step 2: Brush the heating chamber
Use a dedicated vaporizer brush to gently sweep the interior walls of the oven. Focus on the ridges and corners where plant material tends to stick. Avoid using metal tools, which can scratch the coating and alter heat distribution. For devices with a conduction/convection hybrid design, pay special attention to the air channels that run along the side of the chamber. Removing loose debris here prevents uneven heating and ensures consistent vapor density.
Step 3: Clean the mouthpiece and screen
The mouthpiece is the primary point of contact for residue buildup. Wipe the exterior with a cotton swab dipped in high-proof isopropyl alcohol. If your model features a removable screen, soak it in a small container of isopropyl alcohol for ten minutes to dissolve hardened resin. Rinse the screen thoroughly with warm water and let it air dry completely before reinstallation. A clogged screen restricts airflow, forcing the device to work harder and potentially triggering overheating protections.
Step 4: Wipe the exterior
Use a microfiber cloth to remove fingerprints and dust from the device's exterior. For plastic or painted metal bodies, avoid harsh solvents that might degrade the finish. A dry or slightly damp cloth is usually sufficient. This step maintains the aesthetic condition of the vaporizer and prevents dust from being drawn into the intake vents during use.
-
Brush chamber to remove loose debris
-
Wipe mouthpiece with isopropyl alcohol
-
Soak and rinse screen if resin builds up
-
Wipe exterior with microfiber cloth
Step 5: Reassemble and test
Once all components are completely dry, reassemble the vaporizer in reverse order. Ensure the mouthpiece is screwed on tightly to prevent air leaks, which can cool the vapor prematurely. Perform a brief test session at a low temperature to verify that airflow is unobstructed and the vapor tastes clean. If you detect any burnt notes, repeat the cleaning process, focusing on the screen and air channels.
No comments yet. Be the first to share your thoughts!